It’s important to maintain your guitar is if you want it to sound great, last longer, and look good! In this post we’ll be covering 4 aspects of looking after your guitar, with helpful videos for each, where our in-house guitar tech, Jamie, shares his tips and tricks while using the best Dunlop products, providing you with walkthroughs on how to:
- Take Care Of Your Guitar Neck
- Set Up Your Guitar
- Take Care Of Your Guitar’s Body / Finish
- Restring Your Guitar
We have also listed the best Dunlop products you’ll need to maintain your guitar, making it easier for you to get started right away! Dunlop has some great high-quality cleaning and guitar maintenance products that are designed for specific jobs rather than one-size-fits-all, so you know you’re using what’s best for your guitar. They also have some handy tools to make cleaning and adjusting your guitar as easy as possible.
How To Take Care Of Your Guitar Neck
Keeping your fretboard clean and hydrated is an important part of maintaining your guitar and getting the best sound out of your guitar. Learn the RIGHT way to clean the fretboard and neck from our resident in-house Guitar Tech, Jamie, who explains in detail about:
- Different types of woods and which products to use on them
- How to clean the frets without damaging the fretboard
- Lubricating the contact points
- Cleaning the back of the neck
What you’ll need:
- Formula 65 Body & Fingerboard Care Kit
- Formula 65 Fingerboard Care Kit
- Micro Fine Fret Polishing Cloth
- System 65 Guitar Setup Mat
- System 65 Fret Collar Kit
- Formula 65 Guitar Cloth, Polish and Wax Kit
Fretboard Woods
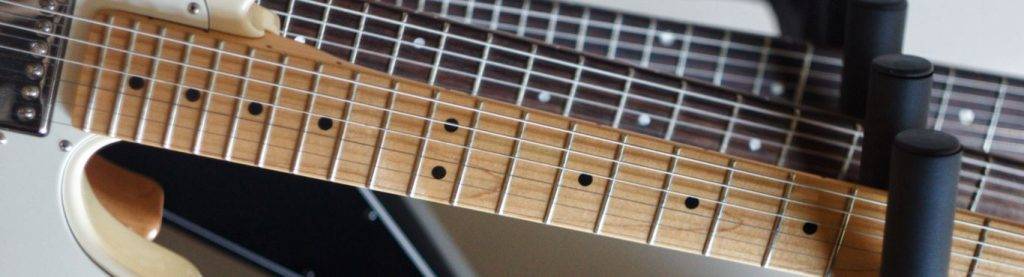
Maple
This is a dense wood without many pores, so it mostly just needs cleaning when necessary. You don’t need to use too much of this.
Use: Formula 65 Guitar Cloth, Polish and Wax Kit
Rosewood
This is an open-pore wood which can dry out easily, so it’s good to keep it hydrated.
Use: Formula 65 Fingerboard Care Kit
Ebony
This is also an open-pore wood, and it’s especially important to keep these well-hydrated, as it will start cracking if it dries out.
Use: Formula 65 Fingerboard Care Kit
How To Set Up Your Guitar
Setting up your guitar is an important part of guitar maintenance, and doing it properly will enhance the sound of your guitar. Using these best practices will help prolong the life of your guitar and make everything function as it should. It’s also a great way for learning how your guitar works, and how each piece interacts with the rest of the guitar. Learn the RIGHT way to set up your guitar from our resident in-house Guitar Tech, Jamie, who uses the best Dunlop products and explains how to:
What you’ll need:
- System 65 Screwdriver Set
- Contains 2x Philips heads and 2x flatheads
- System 65 Action Gauge
- Used to measure the distance between the fretboard and strings, includes inches and mm
- System 65 Multi-Tool
Adjust The Truss Tod
The truss rod is a steel bar that runs inside the neck, counteracting the pull of the strings and keeping the neck straight. If you loosen it, it will add ‘relief’ to the neck, where it’s slightly bowed, and tightening it makes it straighter and a little easier to play.
Set The Guitar Action
The distance between the top of the frets to the bottom of the strings. A high action (more distance between strings and fretboard) allows players to play harder, and getting a fuller sound, without getting ‘fret buzz’. The benefits of a lower action (frets and strings closer together) are that the strings are easier to press down.
Move The Bridge Saddles
For adjusting the guitar action, you can raise or lower the saddles to make the strings further from or closer to the fret, and to get the correct intonation, you can lengthen or shorten the saddles.
Intonate Your Guitar
This is how in-tune your guitar is along the whole fretboard. You want the 12th fret (the halfway point) to be exactly the same note as it is at the nut, so wherever you play on the guitar it will be in tune. Play a harmonic on the 12th fret and use a tuner to make sure it’s in tune, and then push down on the 12th fret and make sure that’s also in tune.
How To Take Care Of Your Guitar’s Body / Finish
Every guitarist wants their guitar to look the best it can, so it’s important to clean and maintain the body and the finish. While it’s a fairly straightforward task, there are certain aspects of maintaining your guitar to be aware of that could make a big difference and really benefit your guitar. Learn the RIGHT way to clean and maintain the body and finish of your guitar from our resident in-house Guitar Tech, Jaime, who provides handy tips and explanations on:
- Why you should always use a new cloth
- Different types of finish and how to clean them
- What is Finish Checking
- Electrical-related problems from not cleaning your guitar
What you’ll need:
- Formula 65 Body & Fingerboard Care Kit
- Guitar Finish Cloth
- System 65 Uni-Wrench
- A handy tool which can be used to adjust nearly every nut on your guitar
- Formula 65 Guitar Cloth, Polish and Wax Kit
- Contains a 100% cotton cloth, Guitar Polish and Cleaner, and Bodygloss Cream of Carnauba, which adds a protective layer of wax to the guitar and fills in any micro-scratches.
Guitar Finish Types
Nitrocellulose
Nitrocellulose is a thin finish that was used by Fender and Gibson on their guitars from the 50’s and 60’s, and now it’s commonly used on high-end and vintage guitar models. Nitro is considered more porous than polyurethane or polyester, and it’s quite soft so it doesn’t take much to put a mark on it, but you can make a near-invisible repair on it if you do.
Polyurethane
The vast majority of guitars are finished with Polyurethane, which is glossier and much more hard-wearing than nitrocellulose, so it’s harder to accidentally make a mark in it.
Satin
Satin finishes don’t need to be cleaned as much and don’t show fingerprints as much as other finishes. However, it’s almost impossible to repair if there’s a mark or scratch in it.
What Is Finish Checking?
Found on guitars with nitrocellulose finishes. As the guitar ages, the wood expands and contracts. This pulls the finish with it, as it can’t move as fast as the wood underneath it, causing it to crack. Using a wax-based cleaner can accelerate the checking process.
If your guitar has “checking”, you can use the Polish and Cleaner from the Formula 65 Guitar Cloth, Polish and Wax Kit. If it doesn’t have checking and has a brand new finish, it’s better to use the Platinum 65 Deep Clean and Spray Wax as it’s easier to work with and leaves a layer of wax on the guitar for added protection.
How To Re-String Your Guitar
Restringing a guitar is one of the things every guitarist should know how to do. It’s important to change strings fairly regularly, as dirt, sweat and other corrosive elements will damage the strings, making them look rusty and sound dull. Luckily, you can get your guitar sounding great again without too much effort!
Learn the RIGHT way to do it from our resident in-house Guitar Tech, Jamie, who shares some of his tricks to maintain your guitar properly and explains in detail about:
- How to restring for different types of tuner
- Signs that it’s time to change strings
- Different string gauges and how they affect your guitar
- What string trees are
- Making your strings stay in tune
- How to make your strings last longer
What you’ll need:
- System 65 Guitar Setup Mat
- Deluxe Road Pro String Winder, Guitar
- System 65 String Cutter
- New strings
- Ideally use the same string gauge as recommended by the manufacturer
Tuner Types
Vintage
These have a slot with a hole in the centre where the string goes. For vintage tuners, you need to leave some extra string (around the length of 4 tuning posts) and the end and cut it before you start winding.
Locking
Locking tuners are probably the easiest to use when restringing your guitar because you don’t need to measure any extra lengths of the string beforehand or try to get the strings to wind around a certain way.
Hole-Through
When re-stringing hole-through tuners, you should start with some slack (about the length between two tuning machines), and then start winding – manually wind once around the top of the tuner, then use the tuning machine to wind the rest of the string underneath, so the string stays in tune better. It’s best practice to have the strings on the inside of the tuners.
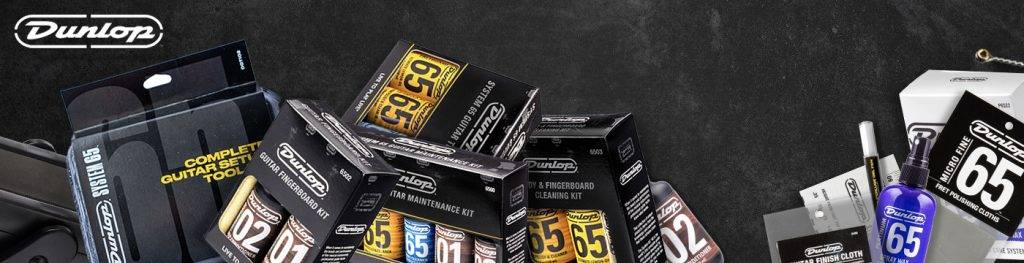
Dunlop’s Guitar Maintenance Accessories are a must-have to maintain your guitar and keep it looking and sounding fresh.
Take a look at our range of Dunlop’s Care Kits, which would make great gifts for beginners and professionals alike:
Formula 65 Fingerboard Care Kit
System 65 Guitar Tech Care Kit
System 65 Guitar Complete Setup Kit
Formula 65 Body & Fingerboard Care Kit