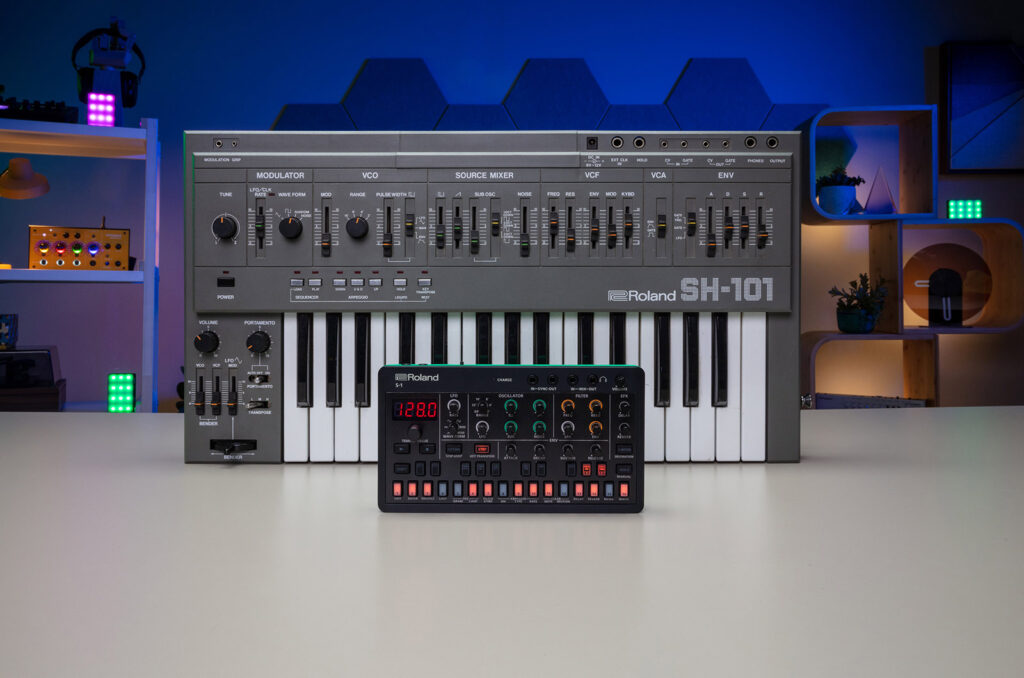
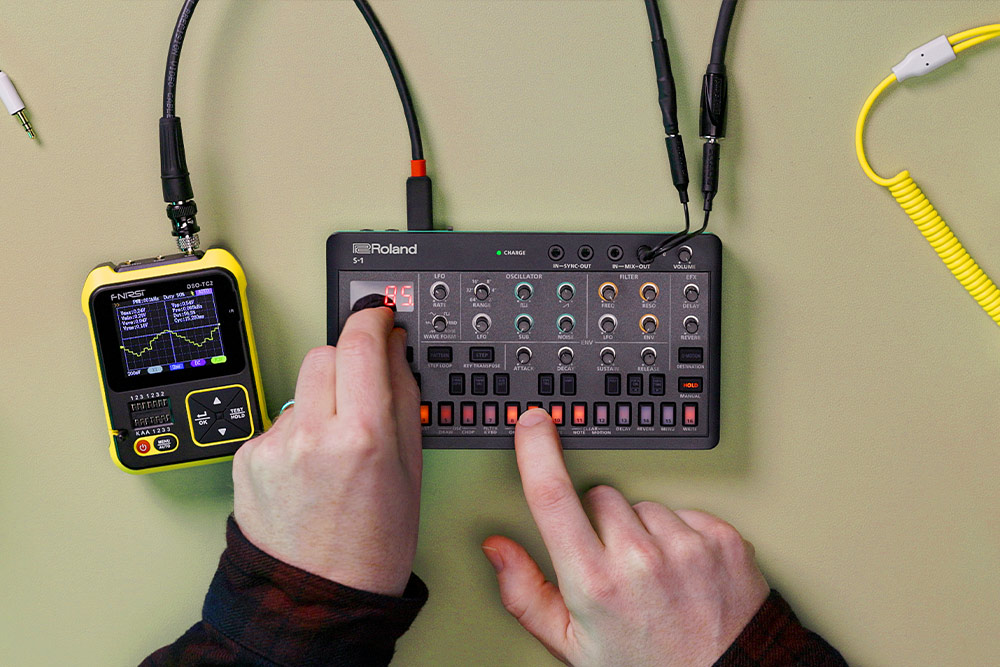
In the galaxy of synthesizers, the portable Roland S-1 Tweak Synth, part of the best-selling AIRA Compact range, emerges as a beacon of vintage charm intertwined with contemporary ingenuity.
Inspired by the legendary Roland SH-101, the S-1 Tweak Synth promises an adventurous journey from nostalgic bass lines to uncharted wave manipulations, making it a must-have for synth enthusiasts.
Whether you’ve just added the S-1 to your collection or are considering this for your next purchase, these top 5 tips will enhance your experience with this gem.
At the heart of the Roland S-1 synth module is its ACB technology. This innovative Roland synthesizer tech, also found in the best-selling System-8 and Boutique modules such as the JU-06A, TB-03 and TR-08, is responsible for the S-1’s rich, punchy and warm SH-101-style sound.
ACB, short for Analog Circuit Behavior, digitally recreates every single component of an analogue synthesizer. The result is authentically analogue sound, with all the quirks and inconsistencies that give vintage synths their organic character, in a compact synth module that fits in your pocket.
Skip Ahead
#1 – Get the Roland S-1 Connected to Your DAW or Mobile
#2 – Embrace the Riser Effect
#3 – Harness D-Motion
#4 – Go Beyond Classic Analog with OSC Draw & OSC Chop
#5 – Using Parameter Automation for Sound Design
Portable Synth Power
Essential Shortcuts for the Roland S-1 Tweak Synth
Let’s dive into our first tip for seamlessly integrating the Roland S-1 with your DAW and compatible mobile device.
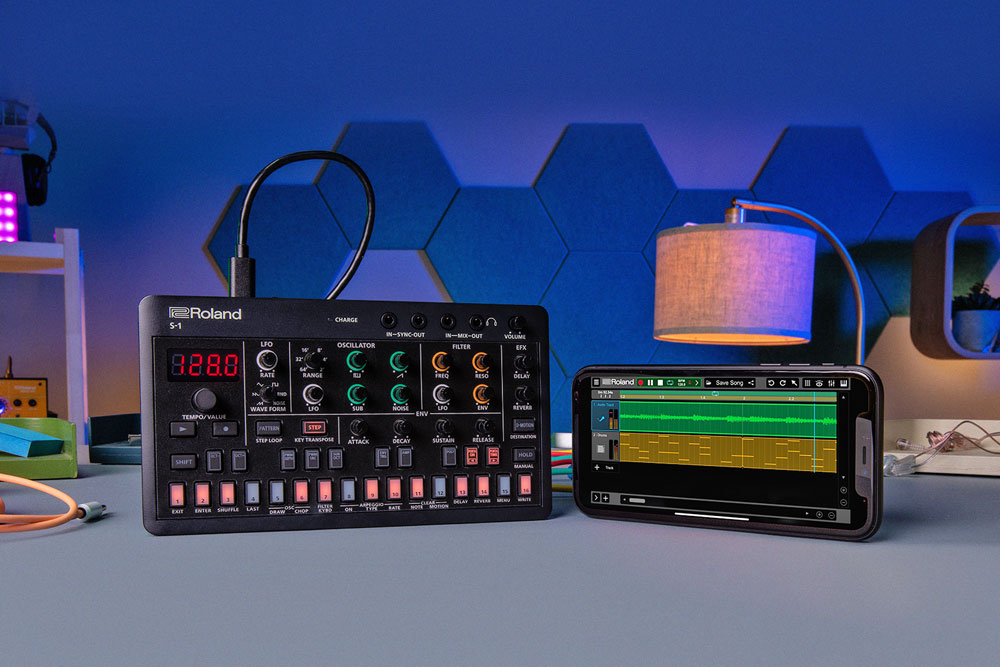
#1 – Get the Roland S-1 Connected to Your DAW or Mobile
In today’s digital age, the seamless integration of hardware like the S-1 Tweak Synthesizer with our DAWs and mobile devices can feel like a symphony in itself. And the S-1 doesn’t disappoint.
Its class-compliant nature ensures that you don’t need to rummage through the web for additional drivers; it’s ready to connect straight out of the box, supporting the USB Audio Device Class 2.0 specifications.
Turning Off AIRA Link
Now, the AIRA Link is a fantastic feature on the S-1 that allows effortless synchronisation with other AIRA Compact modules such as the J-6 Chord Synth and T-8 Beat Machine. However, if you want to integrate the S-1 Tweak Synth with your computer or mobile device it’s essential to ensure it’s off.
Don’t fret; it’s a simple process. Start by holding down the [SHIFT] button and pressing pad [15] labelled MENU. The [TEMPO/VALUE] knob will be your guide. Select “A.Lnk”, give pad [2] a gentle tap to enter, and set the value to “OFF”.
A quick double exit with pad [1] and you’re set. It’s good practice to reboot your device afterwards to let the settings take effect.
When connecting to a DAW, a crucial step often overlooked is ensuring the MIDI Channel on the S-1 corresponds with your DAW. It’s like ensuring two dance partners are moving to the same beat.
While it might be tempting to use that USB hub lying around, the S-1 prefers a direct connection. Also, charging cables won’t work. The S-1 requires a data cable in order to fully function. Please note that not all apps or Android devices will work alongside it.
Getting Connected
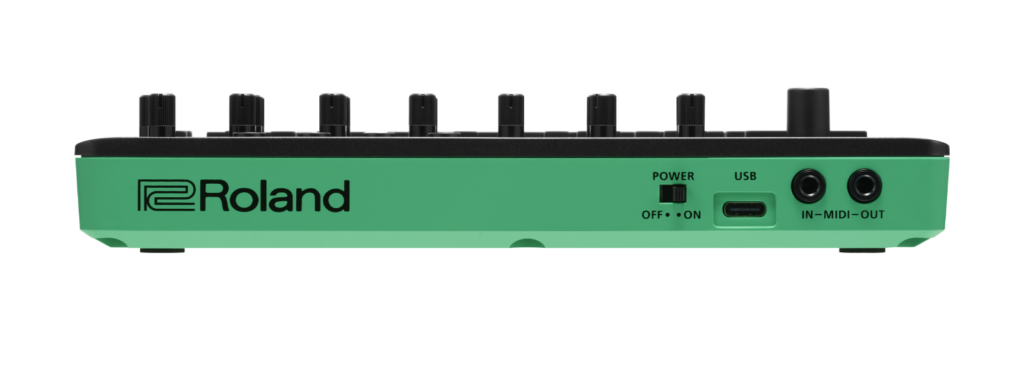
Now, onto the actual connection. For those pairing with a computer, the included USB Type-C to USB Type-A cable is your best friend. If you’re an iOS user with Lightning connectors, remember to power up the S-1 in its battery-only mode (turn it on whilst holding down button 1 in the sequencer).
With the help of an Apple USB adapter, like the ever-reliable Lightning-USB Camera Adapter, you’ll be able to establish a firm connection using the USB Type-C to USB Type-A cable.
However, for those iOS users blessed with a USB Type-C port, a straight USB Type-C cable will have you sorted, with the added perk of the S-1 drawing power from your device.
Jump Back to the Start

#2 – Embrace the Riser Effect
The vast world of electronic music is teeming with sound elements that bring songs to life, none more so than the iconic Riser. For the uninitiated, a Riser is that tantalizing rising sound you hear as a track builds up, culminating in a musical climax.
It’s the adrenaline boost, the crescendo before the drop, and in contrast, there’s its moody sibling, the “Downer”, which is the falling sound that follows, allowing the track to breathe and reset.
Exploring the Riser effect on the Roland S-1 is akin to unlocking a secret weapon in the arsenal of electronic music production. It offers an array of possibilities, from dramatic build-ups to nuanced sound modulation.
Now, the Roland S-1 Tweak Synthesizer introduces its own spin on these elements with the Riser effect, and it’s worth diving into.
Before we delve into the Riser, don’t forget the golden shortcut. Pressing [SHIFT], [EXIT], and [ENTER] simultaneously swaps the noise dial for a sweep, allowing for tempo sync and other features like the quick pan mode.
A New Twist on the Noise Dial
The S-1 cleverly repurposes the [NOISE] knob to control both the riser and downer effects. When turned to its minimum or maximum, the Riser sound falls silent. But as you twist it from its minimum up to its midpoint, the rising sound elevates, perfectly accompanying a song’s crescendo.
Spin it from the midpoint to the maximum, and you’ve initiated the downer, marking the track’s climactic zenith. If you ever want a moment of silence or to switch between effects without outputting sound, simply hold the [SHIFT] button while adjusting the [NOISE] knob.
Configuration is Key
Setting up the Riser is intuitive. Begin by pressing [SHIFT] and pad [15] to enter the MENU. From there, the [TEMPO/VALUE] knob lets you navigate and select parameters. A nifty shortcut to oscillate between Riser Mode settings is to press both pad [1] and pad [2] simultaneously while still holding [SHIFT].
When in active Riser Mode (anything but “OFF”), the device doesn’t save the output state of the riser sound based on the [NOISE] knob’s position. So, every time you switch patterns, be prepared to re-adjust if necessary. For seamless transitions, both patterns should have the Riser Mode enabled.
This ensures that any adjustment made to the [NOISE] knob (like activating the riser effect as the pattern ends) continues into the next pattern, making for a perfect riser-to-downer transition.
Mod Wheel Control
For those wanting to incorporate external controllers such as a MIDI keyboard, the Riser effect can be MIDI assigned to the mod wheel. This offers a heightened level of control and integration for live performances.
Jump Back to the Start

#3 – Harness D-Motion
The realms of electronic music and DJing are constantly evolving. As technology advances, artists and producers are perpetually in search of new ways to push the envelope of creativity. Enter D-MOTION, the Roland S-1’s innovative tactile performance feature, which is changing the game.
Understanding D-MOTION
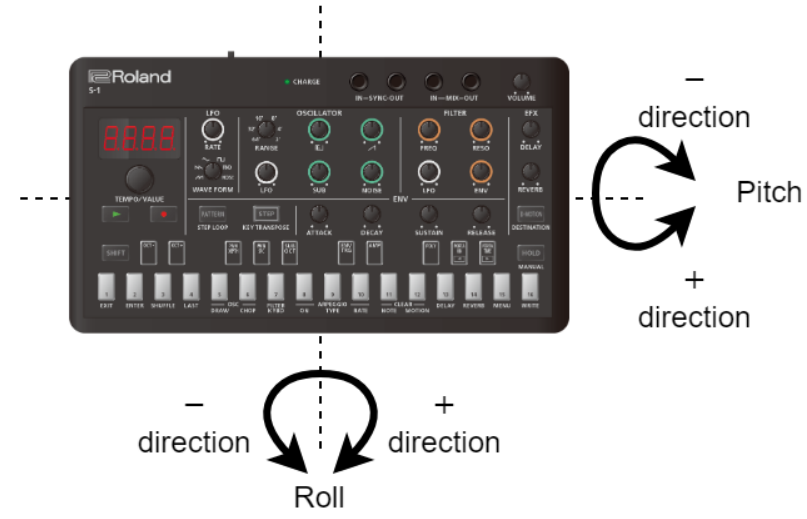
At its core, D-MOTION is a live manipulation tool that lets you tweak the tones and effects of your sound output based on the tilt of the S-1. Simply put, you can now morph your sound and add effects on-the-fly by just tilting the device while you play.
Want to get a hands-on understanding? Try playing with the preset patterns 1-01 through 1-16 to experience this feature’s potential firsthand.
Remember, with great power comes great responsibility! When using D-MOTION, ensure you have a firm grip on both sides of the unit to prevent accidental drops. Also, be cautious not to bend any connected cables excessively.
How to Harness D-MOTION
- Begin by initiating pattern playback with the [ø] (PLAY) button.
- Hold the unit firmly and activate the [D-MOTION] mode using your right thumb or another finger.
- Dive into the creative realm by tilting the device either back and forth (pitch) or side-to-side (roll) to morph the tone. But always be mindful of the unit and the cables.
- Once you’ve created the desired effect, simply release the [D-MOTION] button to return the tone to its original state.
Customizing D-MOTION
Dive deeper into D-MOTION by accessing its settings. Press [SHIFT] and the [D-MOTION] button simultaneously. Here, you can assign various parameters that respond to the tilts:
- Nod (Modulation): Simulates a MIDI modulation, cyclically changing pitch or filter based on tilt.
- FrEq (Frequency): Adjusts the cutoff point based on tilt.
- rESo (Resonance): Modifies frequencies around the cutoff point with the device’s tilt.
- P .bnd (Pitch Bend): Introduces pitch bend changes similar to MIDI pitch bend data.
- PAn (Pan): Adjusts the stereo position from left to right.
- EXP (Expression): Alters the volume, much like MIDI expression data.
- d .LEv (Delay Level) & r .LEv (Reverb Level): Manipulates the delay and reverb volumes based on the unit’s tilt.
Embracing the D-MOTION feature in the Roland S-1 is like holding a magical wand, allowing you to weave new soundscapes with mere tilts. Whether you’re a seasoned performer or a budding enthusiast, D-MOTION provides a dynamic layer of expressivity to your performances.
Jump Back to the Start

#4 – Go Beyond Classic Analog with OSC Draw & OSC Chop
When synthesizer aficionados reminisce about the vintage magic of the Roland SH-101, many would argue that it’s tough to top.
Yet, with Roland’s latest marvel, the S-1, there’s an evolution at play that offers not just an ode to the past but a vivid leap into the future. Beyond replicating those cherished SH-101 tones, the S-1 breaks new sonic ground, introducing the revolutionary OSC Draw and OSC Chop functions.
Crafting New Horizons: The OSC Draw
Step beyond traditional waveforms and craft your signature sounds. The OSC Draw function, designed around the square wave oscillator, is an artist’s canvas waiting for its unique imprint.
Using OSC Draw replaces the square wave, giving you the option to layer it with the sub-oscillator, sawtooth waveform and noise generator.
- Accessing OSC Draw: Use [SHIFT] with pad [5] (OSC DRAW). Navigate with [TEMPO/VALUE] and select using pad [2] (ENTER).
- Waveform Design: The ‘ForM’ mode divides a waveform cycle into 16 interactive segments. Pads illuminate based on the wave height value, with brightness mirroring value intensity.
- Waveform Multiplication: With the ‘Multiply’ parameter, the playback speed and pitch are at your command, giving your waveform a cyclical aura.
Sculpting the Sonic Art: OSC Chop
Harness the power of harmonics and redefine waveforms with the innovative OSC Chop:
- Initiating OSC Chop: Pair [SHIFT] with pad [6] (OSC CHOP). As usual, use [TEMPO/VALUE] and pad [2] (ENTER) for navigation and adjustments.
- Harmonic Exploration with ‘Overtone’: Intensify your sound’s chop pattern and illuminate the harmonics. At an ‘ovtn’ value of 100, experience an entirely muted waveform, a canvas of silence ready for rebirth.
- Personalized Chop Patterns: Define your sound character, whether through the ‘Sqr .P’ for square waves or ‘SUb .P’ for sub-oscillators. Each waveform avails a unique chop pattern, granting you the conductor’s baton to dictate its rhythm and pulse.
With the S-1, Roland extends an invitation to both nostalgic synth lovers and avant-garde sound pioneers. As a bridge between the revered past and an uncharted future, the synthesizer promises not just a replay of iconic Roland analogue sounds but a journey into realms the SH-101 could only dream of.
The OSC Draw and OSC Chop functions are not just features; they are emblematic of Roland’s commitment to pushing boundaries in sound creation. Whether you’re moulding fresh sounds from scratch or refining an existing masterpiece, the S-1 beckons you to a new age of sonic exploration.
Jump Back to the Start
#5 – Using Parameter Automation for Sound Design
When you think of sequencers, what comes to mind? Perhaps a tool for crafting and arranging melodies? With Roland’s S-1 synthesizer, you’ll need to expand that definition.
Beyond the traditional sequencing capabilities, the S-1 introduces an unparalleled depth of sound design potential. By utilizing its parameter automation, the sequencer emerges as a robust sound-sculpting tool, akin to having eight auxiliary LFOs at your beck and call.
Reimagining the Sequencer: Beyond Notes and Beats
Most synthesizers allow for sound modulation, but the S-1’s sequencer treats modulation as an art. You’re not merely programming a sequence; you’re painting with sound.
When you play a pattern, the sequencer can recall knob operations, MIDI message-related changes such as control changes, and pitch bend messages, treating them as “motions”.
The S-1 offers a triad of methods to record these motions, each tailored for nuanced sound design:
- Type A: Hold a step pad, turn the knobs, and sculpt the sound in real time.
- Types B/C/E: Focus on a specific step, adjusting the knobs for targeted changes.
- Type D: For the most dynamic sound shifts, modify parameters in real-time as the sequence unfolds.
Assignable Parameters
To understand the depth of the S-1’s sequencer, consider the vast array of parameters you can automate:
- Oscillator Modulations:
- OSC Draw Multiply: Create waveforms with adjustable lengths.
- OSC Chop Comb: Chop up waveforms and apply varying degrees of emphasis.
- Pulse Width Modulation: Add richness to the sound by manipulating the pulse width.
- Filter Characteristics:
- Filter Frequency: Sweep through spectrums for evolving tones.
- Filter Resonance: Add sharpness or mellowness to your sound.
- Envelope Dynamics: Modulate Attack, Decay, and Release for expressive sound shaping.
- Effects Dynamics:
- Reverb Level: Make your sounds spacious or keep them close.
- LFO Rate: Adjust the speed of modulation for vibrato or tremolo effects.
- Pitch and MIDI Dynamics:
- Pitch Bend: Slide between notes for added expression.
- MIDI Control Changes: Assign and modify MIDI signals for a wide range of effects.
The Roland S-1 is a testament to the fusion of sound design and sequencing. It transforms the traditional sequencer into a potent sound design tool, blurring the lines between rhythmic patterns and sonic textures.
Jump Back to the Start

Portable Synth Power
The Roland S-1 embodies a perfect blend of heritage and innovation at an affordable price point. Its roots in the iconic Roland SH-101 deliver a warm and familiar foundation, while its advanced features like the OSC Draw, OSC Chop, and the versatile sequencer launch it into a realm of its own.
From classic analogue tones to boundary-pushing experimental sounds, the S-1 caters to a wide array of musical needs and tastes. The ability to automate a wide array of parameters, almost like having eight additional customizable LFOs at your disposal, broadens the horizon of sound design.
Whether you are a sound design enthusiast, an experimental musician, or simply someone who loves synthesizers, the Roland S-1 has something unique to offer you.
Its multifaceted and innovative approach to synthesis, coupled with its intuitive interface and design, makes the S-1 a must-have tool for anyone passionate about pushing sonic boundaries – anytime, anywhere.
Click here to shop the Roland S-1 Tweak Synth, AIRA Compact range and Roland synthesizers at GAK. We’re ready to ship to you with free UK next day delivery on orders over £149 so you can start jamming with your new synthesizer as soon as possible.
You can also head down to our Brighton store to try the Roland S-1 out in person, chat with our expert Pro Audio team and take one away on the same day!
Jump Back to the Start
Essential Shortcuts for the Roland S-1
- Turn Off AIRA Link: Hold down [SHIFT] button and press pad [15] labelled MENU, select “A.Lnk” and set the value to “OFF”.
- Swap Noise Dial for Sweep: Press [SHIFT], [EXIT], and [ENTER] simultaneously.
- D-MOTION Activation: Initiate pattern playback with the ø button and activate the [D-MOTION] mode using your right thumb or another finger.
- Riser Effect Activation: Press [SHIFT] and pad [15] to enter the MENU, navigate and select parameters using the [TEMPO/VALUE] knob, press both pad [1] and pad [2] simultaneously to oscillate between Riser Mode settings.
- OSC Draw Function: Use [SHIFT] with pad [5] (OSC DRAW) to access, navigate with [TEMPO/VALUE] and select using pad 2.
- OSC Chop Function: Pair [SHIFT] with pad [6] (OSC CHOP) to initiate, navigate with [TEMPO/VALUE] and pad 2 for adjustments.
- Assigning parameters to D-Motion: Press [SHIFT] and [D-MOTION] Button Simultaneously
- Riser settings and other parameter adjustments: Hold [SHIFT] Button and Pad [15] to Enter MENU
- Oscillate between Riser Mode settings: Press Pad [1] and Pad [2] Simultaneously While Holding [SHIFT]
- Change between OSC Draw Multiply and OSC Draw Combine: Press Pad [1] and Pad [2] Simultaneously While Holding [SHIFT]
- Navigate and select parameters during motion recording: Use [TEMPO/VALUE] and Pad 2