
Can’t afford to go to the recording studio? Want to start recording your rehearsals without relying on your smartphone’s built-in mic? Tired of grumpy sound engineers? In this article, I’ll teach you how to mic a band with Shure microphones so you can start recording high-quality demos and take control of your live sound.
Also, if your band is moving to an in-ear monitor-based setup you’ll need to mic up the band at gigs and rehearsals so you can hear everything in your in-ears. With only vocals going into your in-ears, for example, you won’t be able to hear the instruments as the in-ears will isolate you from external sound.
I’ll take you through what mic is suited to the job and its ideal placement. Whilst I always encourage experimentation and using your ears to find out what sounds best to you, I recommend learning the tried and tested methods first. You can always break the rules and try new things once you’ve got the basics down and can reliably achieve a balanced mix.
If your aim is to do some DIY recording or gigs, you may be thinking – isn’t a full set of microphones going to bankrupt me? In the past, you’d be right. However, we are now living in a golden age of affordable gear. Even if you’re on a tight budget, with options like the Shure PG Alta range available you can mic up a band for a lot less. Industry-standard microphones like the Shure SM58 and SM57 are available at a keen price point, incredibly versatile and last for years. There’s a reason why practically every venue and engineer has a 58 and 57 in their arsenal.
Before we begin…
This guide is geared towards miking up a live band for a performance or recording where every member is playing at once. If you want to capture every instrument and vocal simultaneously, you’ll need a mixing desk with a high-channel count. A desk like the Zoom L-20 LiveTrak doesn’t break the bank and can be used for both live and recording applications. The L-20 is equipped with twenty channels (usually enough to mic a band) and doubles as a 22-in/4-out USB audio interface. This means you can plug it into
If you want to learn how to mic a band so you can record, you don’t necessarily need a big, bulky desk. Instead, you can simply plug an audio interface into your computer. The Focusrite Scarlett 18i20 and Scarlett OctoPre is a keenly priced pairing that gives you a pretty portable recording rig with up to sixteen channels.
You don’t necessarily need a lot of channels or a mixing desk if you just want to record. As long as you’re happy recording each instrument or vocal one at a time, you can get away with a smaller interface. The concepts that’ll be discussed in this article will still apply. If you want to fully mic a drum kit, an eight-channel interface should do the job.
What if I can’t afford a fancy mixer or audio interface?
A lot of people can only access a two-channel interface like the Focusrite Scarlett 2i2, SSL 2+ or the Universal Audio Apollo Twin X. Don’t fret! It’s still possible to record a full band using the following techniques and an interface like the aforementioned. You’ll only be able to use a couple of mics on the drum kit, which can still sound great if done right. Sometimes the best results come from limitations.
Dynamic Microphones vs. Condenser Microphones
Throughout this article, I’ll be mentioning dynamic and condenser microphones a lot. Just in case you don’t know much or anything at all about microphones, I’ll briefly explain the differences between the two.
Dynamic mics and condenser mics are the two most common types of microphones. Whilst both effectively do the same job, they’re made differently and therefore have a different sound. There are no rules when it comes to the best one for the job but some are favoured for certain applications.
Dynamics are known to be sturdy and great at handling loud sound sources. They’re often used on guitar amps and drums for this reason. They also have excellent off-axis rejection. This means they focus on picking up the main source and reject background sounds well. It’s why dynamic mics are often the go-to vocal mic for gigs, where a lot of different sounds are going on at once.
On the other hand, condensers are a lot more sensitive and pick up much more detail than dynamic mics. A condenser mic is an excellent choice if you want to capture the nuances of your sound source. They use active circuitry and require phantom power to work. Without it, your condenser mic won’t pick up any sound.
Check out the article Building Your Home Studio – A Buyer’s Guide For Beginners for more information on microphones.
What if I can’t afford any of the recommended mics?
As well as recommending the type of microphone, I’ll also recommend a particular model. Many pro sound engineers gravitate towards certain mics for certain jobs. For example, the Shure Beta 52A is a common choice for kick drums because it sounds superb in that role. Whilst the Beta 52A is a relatively affordable mic, it may be out of your budget. If so, another dynamic mic like the SM57 will also do the job. In fact, super producer Kevin Parker (also known as Tame Impala) favours the sound of an SM57 on his kicks. It’s the case with any condenser mics I recommend, too. Whatever you can get ahold of will do the job.
Last but not least…
Aside from the big things like microphones, interfaces and mixers, you can’t forget about the other essentials. Make sure you have plenty of XLR cables, clips and stands for every microphone or you won’t be able to use them at all. Depending on the size of the venue or studio, you’ll need cables that can reach from the mic to the desk or interface. You don’t want to set up for a session and find your cables aren’t long enough!
How To Mic A Band – Part #1: Drum Kit
The drum kit is usually the most tricky part of miking up a live band. It requires the most amount of microphones and covers the widest range of frequencies. You’ve got the kick drum at one end of the spectrum and the bright cymbals at the other. Whilst mic position is also important for guitars and vocals, it’s particularly crucial when miking a drum kit. Even a slight adjustment can have a dramatic impact on the sound. Usually, you want to get the sound as close to how you want it before you manipulate it with EQ and compression.
I’ll recommend particular mics to use on certain parts of the kit throughout this section. These recommendations are industry-standard mics that are the first choice for many engineers. Shure offer affordable all-in-one drum mic kits if these individual mics are out of your budget. The Shure PGA DRUMKIT range is available in 4, 6 and 7-mic packages so you can choose the right one for the size of kits you’ll be miking. I advise going for the 7-mic version so you can handle virtually any drum-miking context.
The Overheads
The first microphones we’ll set up for the drum kit are the overheads. As well as capturing the high-end detail of all the cymbals, the overheads are responsible for capturing an overall picture of the entire kit. For this reason, a lot of sound engineers advise starting with the overheads before moving on to the close mics. These engineers will use the overheads as a basis for the drum mix before gradually filling it in with the individual drum mics to create an overall picture of the kit. Essentially, overheads are the key ingredient in creating a cohesive and unified drum mix.
What mics should I use and why?
Condenser microphones are regarded as the best overhead mics. Their ability to pick up high-end frequencies will give your drum mix definition, sparkle and clarity. Unlike the mics used on the individual drums, overhead mics won’t be in close proximity to any loud hits so you don’t have to worry about using a mic with a really high SPL tolerance. Whichever mic you use, you’ll need at least two of the same one as overhead setups are usually in stereo.
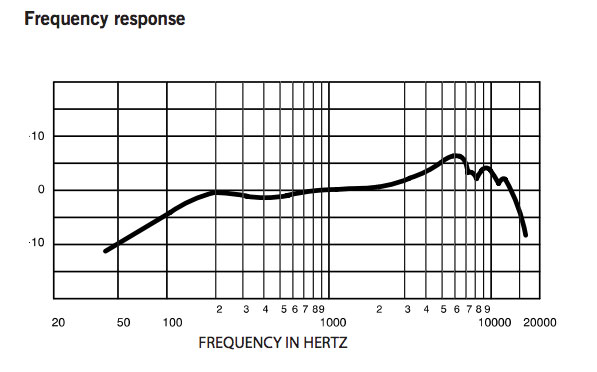
The Shure SM81 is classed by many as an industry standard when it comes to overhead mics. It’s a cardioid condenser microphone with a wide frequency response, low noise and a flat response curve for natural sound reproduction. The SM81 also works well as an instrument microphone, sounding superb on piano and acoustic guitar.
How should I position them?
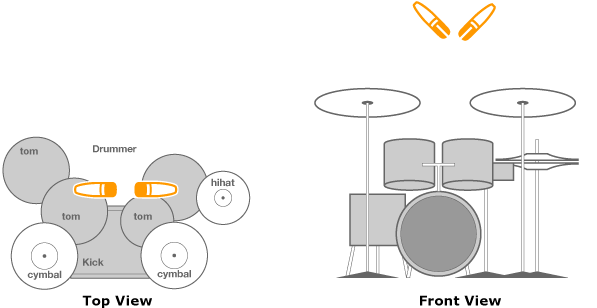
I recommend using an XY or coincident configuration as demonstrated in the above diagram. Compared to a spaced pair, another common overheard miking technique where one mic is placed over the left and another over the right side of the kit, this configuration mitigates any phasing issues due to the mics being close together. Issues with phase often arise from two mics recording the same source at different distances, resulting in a thinner sound. This is because the waveforms are similar and cancel each other out. You won’t get as wide a stereo image using an XY pair but it’s easier and quicker to get a great-sounding result using it.
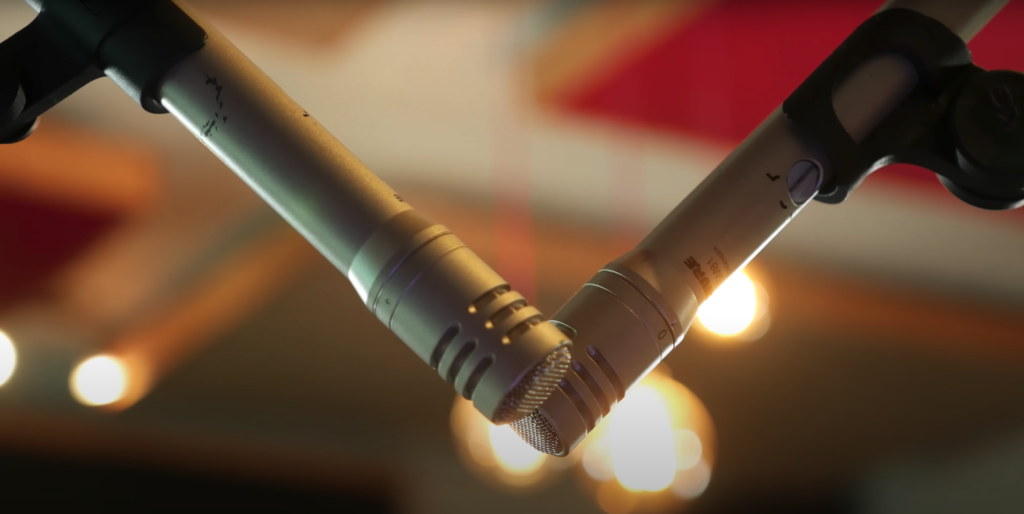
Start by placing the mics next to each other about 3ft above the snare drum. This ensures the snare is at the centre of the stereo image. One mic should point to the left and the other to the right, with the capsules meeting at the front. Use the above photo for reference when setting the angle of the mics. This way, you avoid phasing issues as the kit’s sound is reaching the mics at the same time. It’s worth experimenting with moving the mic height further or closer to the kit. More height results in a roomier sound whilst a lower height will give you a more direct sound. Use your ears to tell you what sounds right.
The Kick (also known as the Bass Drum)
The first drum we’ll mic up is the kick drum. The kick is a vital part of not just the drum kit, but the band as a whole. It’s often what the bassist locks into to create a rhythmic foundation. Usually, you want the kick to have weight and punch so it has authority in the mix. Whilst compressors can help in that regard, it all starts with how the kick is miked and what type of mic is used.
What mic should I use and why?
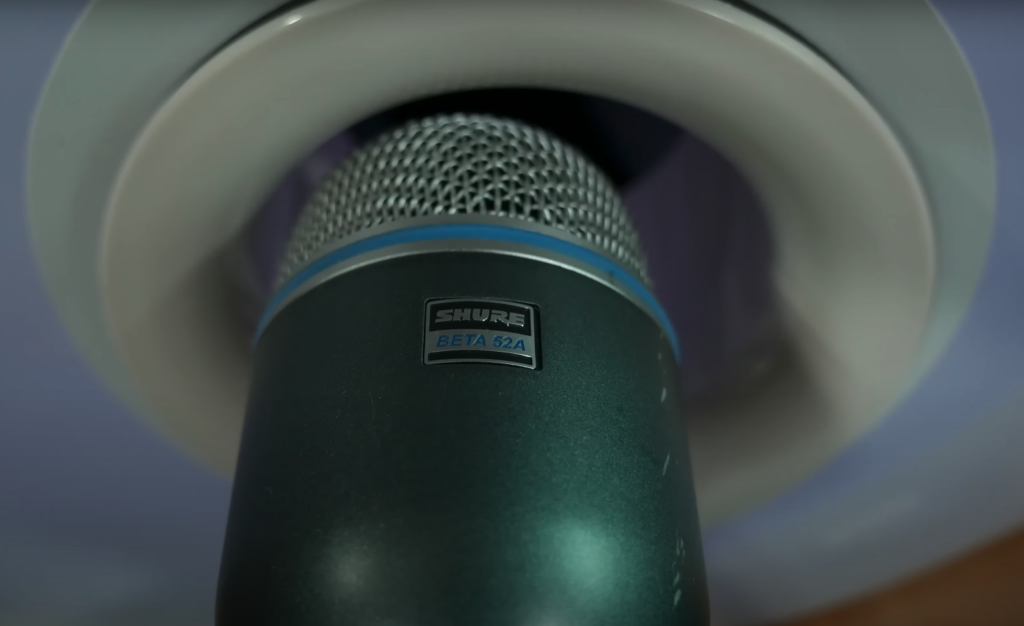
Kick drums are usually hit hard and generate a high sound pressure level (or SPL). You’ll need a mic that can handle the kick’s power, especially if the drummer is the next John Bonham. A large diaphragm dynamic microphone is a great choice. They can handle a tonne of SPL without distorting. The Shure Beta 52A is a favourite kick mic amongst live sound engineers. Its frequency response is optimised for kick drums, ensuring a punchy sound with a clear attack. Plus, its ultra-rugged design will last for years and is pretty affordable for such a high-quality microphone.
How should I position it?
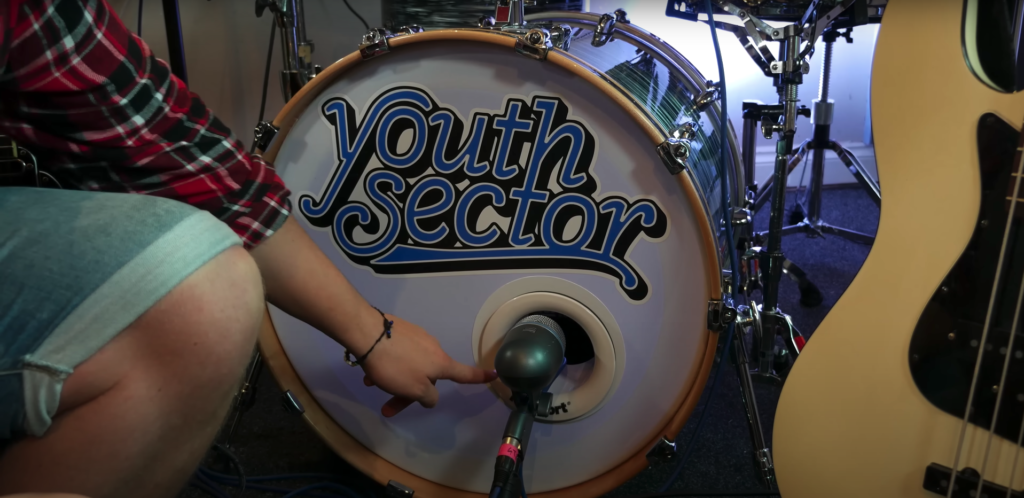
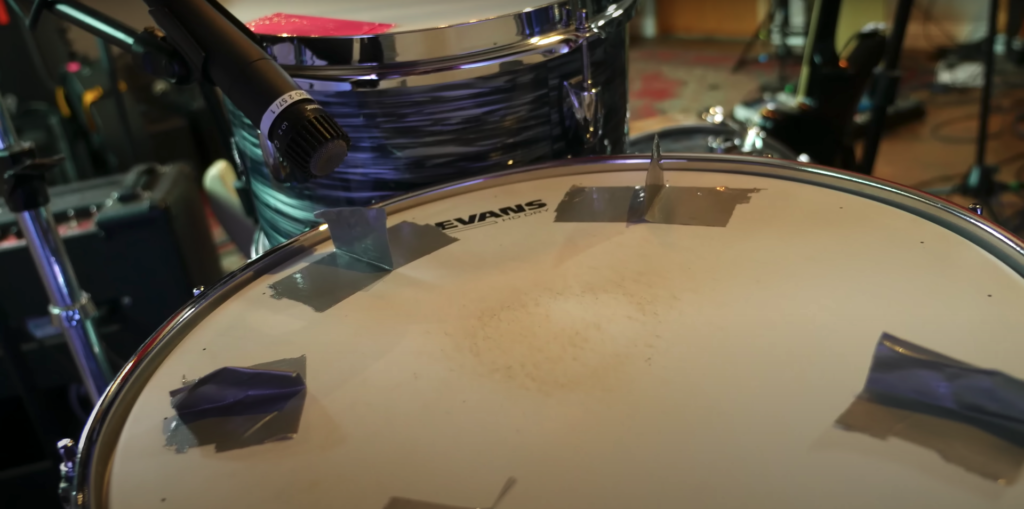
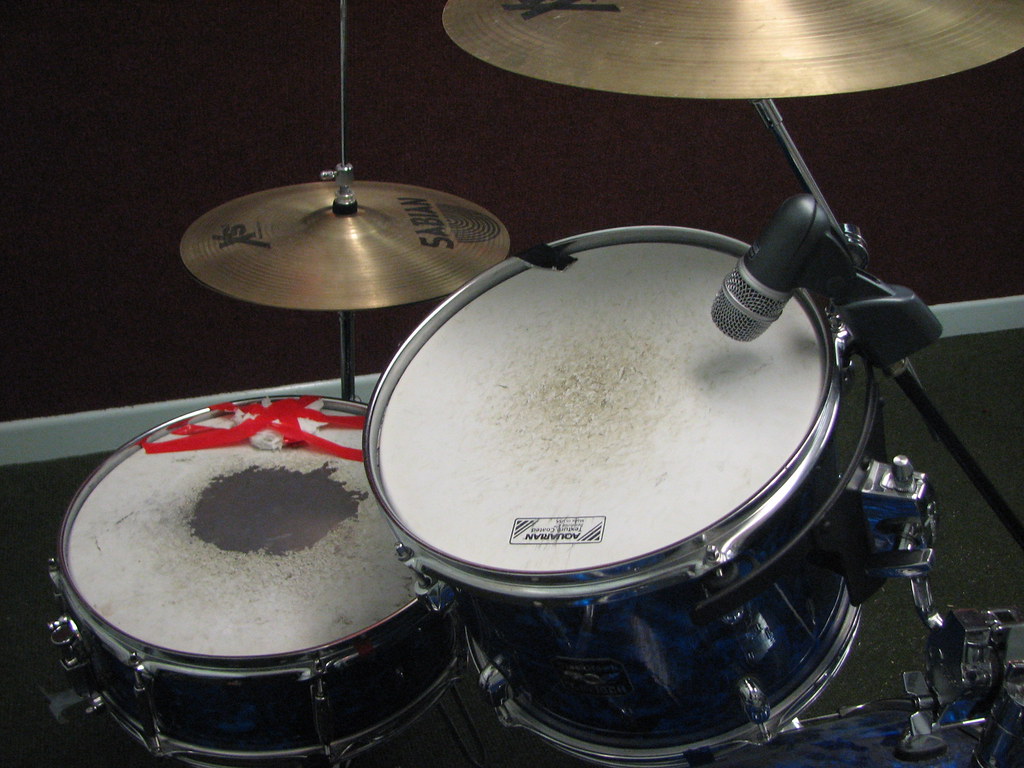
With a large diaphragm dynamic mic, we recommend aiming it at the kick drum’s outer head. The position of the mic and its distance to the head can have a significant impact on the sound.
Distance-wise, around 1-3 inches from the head works well (a tape measure will come in handy). The closer the mic is to the head, the more low-end you’ll capture. The further away the mic is, the more it’ll natural and room-like it’ll sound.
Next, point the mic towards the lower half of the head. Roughly a third of the drum’s diameter away from the rim will provide a nice balance of thud and tone. If the kick has a hole in the front, place the edge of the mic’s capsule at the edge of the hole.
The Snare
Alongside the kick, the snare drum is the most important component of the drum kit. Some describe the snare as the “heartbeat” of the music. It propels the groove and injects it with visceral energy. In most contemporary genres, the snare drum is hit on the two and four of the bar to outline the backbeat for the rest of the band. Changing the placement of the snare hit in relation to the beat can have a dramatic impact on the feel of the music. The snare drum is known for its bright, quick sound. This signature “cracking” sound is due to the set of wires, known as snares, stretched across the bottom drum head.
What mic should I use and why?
A dynamic microphone is the most common choice when miking a snare drum. A snare can make a seriously ear-busting crack when hit, especially if it’s by a rock or metal drummer. A dynamic mic can handle the high SPL a snare drum can generate without distorting or clipping. They’re also not as sensitive as condenser mics and ribbon mics. This means that they’re less susceptible to picking up sound from other sources like cymbals. Ideally, a snare mic will be on the smaller side to make positioning easier as it’ll usually be sandwiched between the hi-hat and toms.
A Shure SM57 is arguably the go-to snare mic for both live and recording applications. Why is the SM57 such a popular choice for so many engineers? It has a pleasingly punchy low end and is great at rejecting sound from the hi-hat. It comes down to the 57’s tight cardioid pattern. This means it focuses on picking up sound directly in front of it and is less sensitive to sound coming from behind it. On the other hand, an omnidirectional polar pattern picks up sound from all directions evenly.
The SM57 has a natural roll-off in the high-frequencies and a reduced bottom-end to tame handling noise (the sound the mic makes when held during a performance). This is why some engineers use equalisation to reintroduce those frequencies. The microphone will be mounted to the stand so handling noise won’t be an issue.
How should I position it?
We want to position the microphone so it’s pointing towards the top (or batter) head of the snare drum. Whereabouts on the head the mic is aimed at will have a dramatic effect on the sound. The sound will be darker, fuller and less overtly “snare-like” towards the centre of the head. Moving the mic towards the rim will increase the sonic balance between the head and snares underneath, resulting in a more “natural” sound. You can use this to your advantage when finding the best-sounding position for the snare you’re miking. As with all miking, there isn’t a one-size fits all solution that guarantees a great snare sound. The room, the size of the snare, the snare’s material and the drummer can vary the sound greatly.
Start by positioning the mic an inch and a half above the head. Then tilt it to a 25-degree angle relative to the head’s horizontal plane. Finally, point it around two inches inside the drum’s outer rim. Once you’re in this position, you can start to adjust it to get the best sound.
The Toms – Floor and Rack

Next, we’ll mic up the tom drums. These are often used for fills and adding weight or colour to grooves. A lot of kits have at least one rack tom and a floor tom. The rack tom is usually smaller and tuned higher than the floor tom. The floor tom, on the other hand, is larger and has a deeper sound than the rack tom. It resides between the kick drum and rack tom in sound and size.
What mics should I use and why?
Dynamic microphones are a good choice for toms for a few reasons. Firstly, Toms can be hit with a high level of velocity so you want a mic that can handle the SPL. Secondly, dynamics are incredibly sturdy so they can handle accidental whacks from a drumstick. Finally, dynamic mics are less sensitive which means they won’t pick up as much spill from the cymbals. Spill is where a microphone picks up audio that isn’t from the main source.
I recommend the Shure Beta 56A for rack toms. Whilst it can also be used for miking guitar amps, woodwind and brass instruments, its works particularly well on toms. It has a compact design that won’t get in the way and a built-in stand adapter, making it easy to set up. The uniform supercardioid polar pattern ensures excellent rejection of off-axis sound. It also allows you to use a lot of gain before the mic starts to feedback (that annoying whistling sound).
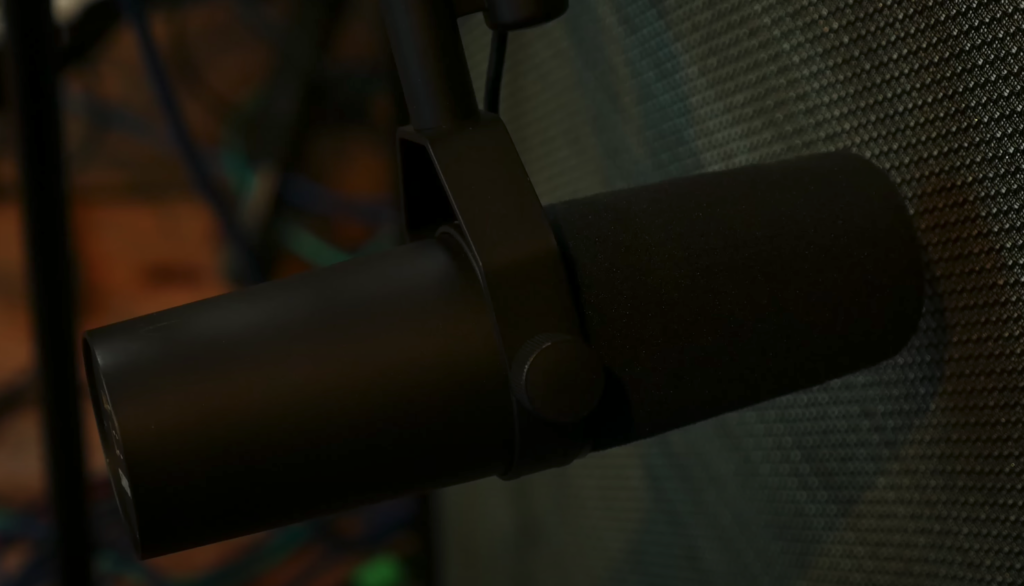
A large diaphragm mic like the Shure SM7B works great on floor toms. Its ability to capture low frequencies means your floor tom will sound deep, focused and fat. The SM7B is simply a solid mic to have in your arsenal as it’s a superb all-rounder. The tom drums on AC/DC’s seminal album Back In Black are miked with the SM7B’s predecessor, the SM7.
How should I position them?
Toms should be close-miked to capture the most direct sound of the drum and minimise the pickup of sound from other sources. You want to point the mic downwards near the outer rim of the tom head at a distance of around 3-6 inches.
The Hi-Hat
Finally, we’ll take a look at the hi-hat. For many drummers, the hi-hat is the most used cymbal in the drum kit. Like the bass drum and snare, the hi-hats play a fundamental role in creating the backbeat and groove that the rest of the band locks into. The hi-hat can be played both closed for a short, crisp sound and varying degrees of open for a longer, more ringing sound. Open hi-hat hits are often interspersed with closed ones to punctuate certain beats.
The hi-hat can be loud and cutting, especially with certain drummers and styles. For this reason, some engineers don’t bother miking it at all. Despite this, I still recommend miking the hi-hat so you’ve got it if you need it.
What mic should I use and why?
I recommend using a dynamic microphone on the hi-hat. The trusty SM57 can easily handle the loud and potentially harsh sound that a hi-hat can produce. Because the 57 is readily available and versatile, it won’t be the end of the world if you don’t end up using it as a hi-hat mic. Alternatively, a condenser microphone like the Shure SM81 can work well if you want to capture more of the hi-hat’s brightness.
How should I position it?
Whether you opt for a dynamic like the SM57 or a condenser like the SM81, you want to mic the hi-hat fairly closely. Start by pointing the mic about halfway between the outer edge and the centre of the hi-hat’s top cymbal. Miking too close to the centre will result in a pinging sound because you’ll be emphasising the bell. Too close to the side of the hi-hat and you’ll pick up a rush of air when the hi-hats close. A good starting point distance-wise is 3-4 inches.
The drummer’s technique and the hi-hat they use can affect how bright or dark they’ll sound. That’s why, once you’ve set up the mic as mentioned above, it’s worth tweaking the placement and tailoring it to the drummer.
How To Mic A Band – Part #2: The Guitar Amps
Now the drum kit is all miked up, we’ll move on to the guitar amps. The electric guitar is a cornerstone instrument in many contemporary genres, from modern pop to death metal, so we want to do it justice. You’ll need a torch handy for this part. The one built into a smartphone will do the trick if you don’t have a standalone torch. This is so we can see where the speaker cone is behind the amp’s grille cloth. By seeing exactly where the cone is, it’ll make things easier for us to determine the sweet spot when miking the amp.
What mic should I use and why?
We’re going to be placing the mic close to the amp’s speaker. This is so the mic will primarily pick up sound coming from the amp rather than elsewhere. Because of this, I recommend using a dynamic microphone. A guitar amp can put out a high SPL, especially with rock and metal genres, so we want a mic that can handle being in close proximity to it.
I recommend using a Shure SM57 on your guitar amps. It is the most widely used mic on guitar amps in both live and recording contexts – and with good reason. It’s affordable, sturdy and its frequency response means it sounds great when used in front of an amp. The Red Hot Chilli Pepper’s Stadium Arcadium, Van Halen’s self-titled debut and Fleetwood Mac’s Rumours are just three examples of albums that use the SM57 to achieve a jaw-dropping guitar sound.

How should I position it?
Start by shining the aforementioned torch or smartphone on your amp’s grille cloth to determine where the speaker is. Next, we’ll want to point the mic directly at the speaker, around halfway between the edge and centre of the speaker cone. In terms of distance from the mic to the grille, you want to leave enough space so you can slide your pinky through the gap.
Once you’ve got your mic in this starting position, you can start to mess around with the placement. Guitar tones can vary wildly between players and their rigs so you want to tailor the mic placement to it. Moving the mic closer to the speaker increases bass frequencies whilst moving it further away has the opposite effect. Moving the mic closer to the centre of the speaker emphasises midrange frequencies whilst moving it towards the surrounding edge reduces them. Instead of “fixing” the sound with EQ straight away, you should try and get the sound as close as possible by changing the mic placement. It’s good engineering practice to get the sound right at the source before tweaking it afterwards.
How To Mic A Band – Part #3: The Bass Amp
The bass guitar partners with the drum kit to create the rhythm section. Together, they provide a rhythmic and harmonic foundation for the rest of the group. Whilst electric guitars tend to reside in the mid to upper mid-range frequencies, the bass guitar occupies the low-mid to, you guessed it, bass frequencies and adds weight to the band’s sound.
Both live and in the studio, a bass guitar sound is often a blend of the miked amp and a direct signal. This direct signal ensures a clean, full bass sound that isn’t coloured by anything. The amp sound is mixed with it to add some character. You’ll need a DI box to capture the bass’ direct signal.
What mic should I use and why?
Like a guitar amp, a bass amp can put out a high SPL so we’ll want to use a dynamic microphone. Whilst a Shure SM57 can work well, a large-diaphragm dynamic mic like the SM7B can capture more of the bass amp’s low frequencies.
How should I position it?
The concepts that I mentioned when miking a guitar amp apply to a bass amp, too. Once again, you’ll need a torch handy so you can see exactly where the speaker is. First, I recommend pointing the mic just outside the outer rim of the speaker cone. Distance-wise, a fist’s width between the grille and the microphone is a good place to start. As with a guitar amp, you can make the sound thinner/boomier and more/less mid-range heavy by changing the distance to the grille and proximity to the speaker cone. Tweak both until you have a sound you’re happy with.
How To Mic A Band – Part #4: The Vocals
Last and certainly not least, we’ll tackle the vocals. If you’re an instrumental band, you can probably skip this section. The vocals are arguably and straightforward part of the band to mic up. The most important thing is the microphone choice. The tricky part is EQing the vocals so they sit nicely in the mix and setting the gain just right so they’re audible without causing feedback – but that’s for another guide!
What mic should I use and why?
If you’re playing with a band live or in the studio, a dynamic microphone is a solid choice. It’ll isolate your voice from the sounds made by the rest of the band and can be fed a lot of gain before feeding back. The Shure SM58 is the industry-standard vocal mic and is the one I’d recommend. The SM58 can be found on stages across the world, from the biggest music festival to the dingiest club venue. Its cardioid pattern means it concentrates on picking up whatever is directly in front of the grill and rejects noise from the back and sides. It also features a pneumatic shock mount that reduces handling noise and is nigh-on indestructible.
If your budget allows, a high-end mic like the Shure KSM8 is an excellent choice. The KSM8 has an extremely wide sweet spot, ensuring a consistent and natural-sounding vocal. The unique Dualdyne design uses both an active and passive diaphragm to virtually eliminate proximity effect. This means if the vocalist like to sing up close to the grill, it won’t muddy up the sound. If you want your vocals to sound professional with minimal processing, the KSM8 is a great mic to have in your arsenal.
How should I position it?
This comes down to the singer’s microphone technique. You don’t want the singer to have their mouth right against the grill as the mic’s proximity effect can make things too bassy. To make sure the high-frequencies are being captured, the mic should be pointing toward the singer’s mouth. If the singer likes to hold the mic whilst performing, they should leave it mounted on a stand during recording for a more consistent sound. You can aim the mic slightly above or below the vocalist’s mouth if pops or mouth noises are an issue. A pop filter can also help reduce plosives during a recording whilst acting as a distance guide for the singer.
Conclusions
If you’ve read the entire article up to this point, you should now have a basic understanding of how to mic a band. As I mentioned earlier, having an understanding of the basics and knowledge of ideal starting points will give you a foundation on which to start experimenting and using your ears to tell you what sounds good. I hope the information in this article will help you in your musical endeavours!
Everything You Need
To cap everything off, we’ve created a host of bundles tailored to certain setups. Depending on your requirements, one of these bundles can be an all-in-one solution if you want to start miking up and/or monitoring your band. Check out our bundles below! Please note, you will still need a mixing desk with enough channels, microphone stands and cables for a complete setup.
Premium Stereo Personal Monitor System Bundle
A complete IEM live and rehearsal rig for a four-piece band with a large drum kit, two guitars, one bass guitar and four vocals.
Shure Live Recording and Monitoring Bundle
A more affordable alternative to the above bundle.
Shure Premium Monitoring Bundle
This bundle is ideal for a four-piece band that wants to start using a professional-quality IEM setup live.
Shure Live Monitoring Bundle
A more affordable alternative to the above bundle.